티스토리 뷰
안녕하세요.
지마켓 Seller & SD Engineering팀 김민우입니다.
며칠 전 어머니께서 대뜸 저에게 미니 전시회를 열 거라고 하시며 팜플렛을 만들었는데,

혹시 모바일로 만들어서 전달하는 게 가능한지 물어보시더군요.
'아니, 저 백엔드 개발자라서 이런거 몰라요' 라는 생각이 머릿속을 스쳤지만, 필자는 어쩌다 보니 이런 기술적인 요청에도 반응하는 효자가 되었습니다. 그렇게 주말을 초대장 만드는데 보내게 되었고, 그 경험을 공유하고자 합니다.
요점부터 말씀드리자면, 방법은 html을 만들고 이를 Github Pages를 활용하여 정적페이지를 무료로 호스팅하는 것입니다. (즉, 프론트 서버만 해당됩니다. 백엔드 서버의 무료 배포 및 호스팅은 Github에서 제공하지 않습니다.)
1. Github Pages를 활성화 시키기
Github 계정에 로그인한 후, repository를 생성합니다. (단, github enterprise 버전에서는 pages 서비스를 별도로 구매해야만 사용이 가능합니다.)
repository를 public으로 설정하셔야만 Github Pages 기능을 사용할 수 있습니다. 코드를 업로드하지 않고 단순히 서버 기능만 무료로 이용하는 것은 허용되지 않는 듯 합니다.
추가로, Github Pages는 React와 같은 웹 기반 코드도 무료로 호스팅 해주기 때문에 미니 프로젝트에 활용하기에도 아주 적합합니다.

그리고 해당 repository를 clone 받아서 index.html 이라는 이름으로 페이지 하나를 임시로 만들어 놓고 채 commit-push 합시다.

다시 github 으로 들어와서 해당 repository에서 Settings > Pages > Branch 를 main과 /root로 바꾸고 Save 버튼을 누릅니다.

코드 변경 후에는 Github Actions (Jenkins와 유사한 CI/CD 도구)가 자동으로 빌드와 배포 과정을 시작합니다. 그러므로 코드 변경 후 바로 페이지에 반영되지 않을 수 있으므로 조금 기다려야 합니다.

그렇다고 무한정 기다리면 또 안되는 것이, 이 과정에서 에러가 있다면 중단됩니다. 에러 발생 시에는 등록된 메일 주소로 알람이 발송될 겁니다. 에러도 없고 메일도 오지 않고도 페이지가 변경되지 않았다면, 가령 css 변경 사항이 반영되지 않을 경우는, 브라우저의 캐시를 지우고 다시 확인하시기 바랍니다. 아무튼 그렇게 한 1~3분 후에 다시 Pages로 돌아와보면 다음과 같이 위에 주소가 나오는데요
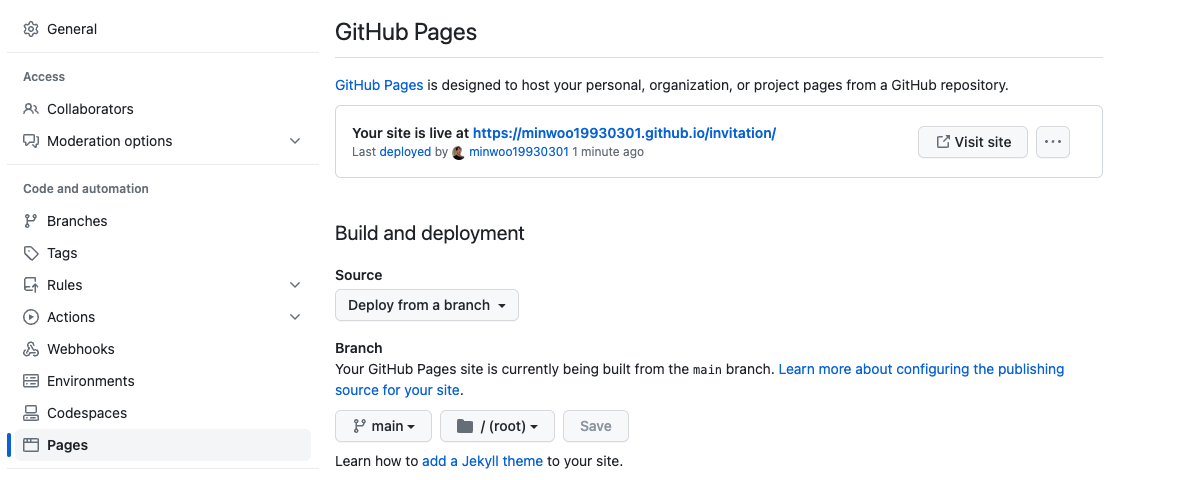
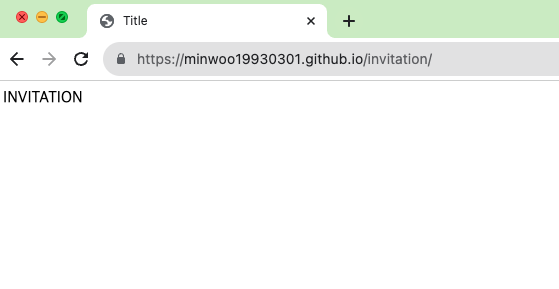
링크를 클릭하면 성공적으로 html 페이지를 만든 것임을 확인할 수 있습니다. 이제부터 main에 push만 하면 자동으로 반영해 줍니다.
2. html 편집 및 사진 삽입하기
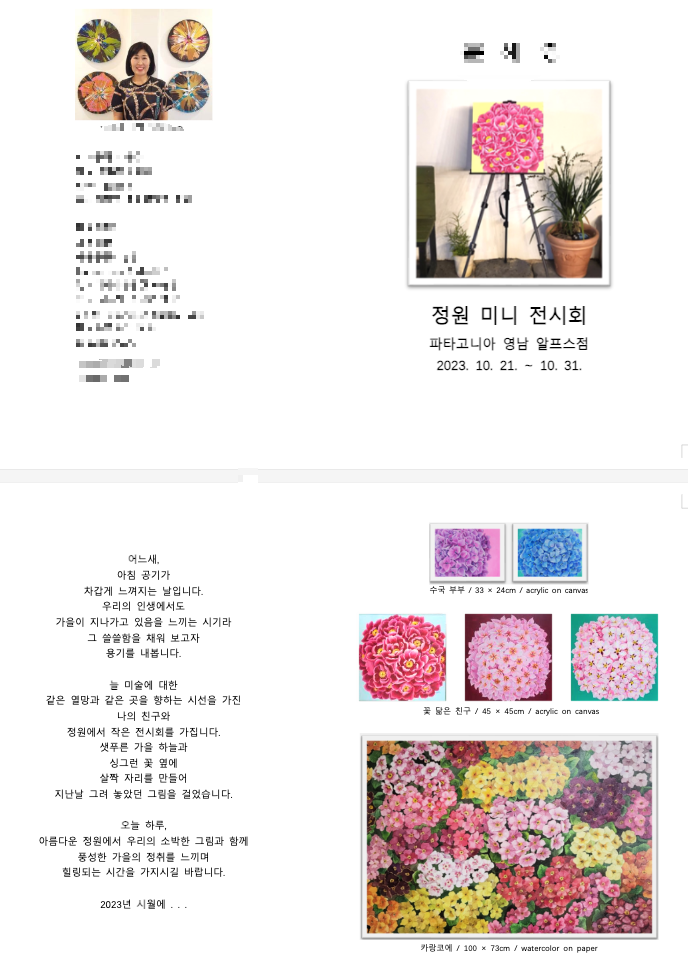
제가 전달받은 요청 사항에는 해당 팜플랫의 한글 파일의 내용대로 4 페이지를 구성하고, 페이지 사이사이에는 페이지를 시각적으로 넘기는 효과를 추가해 달라는 점이 있었습니다.
제일 먼저 해야 할 것은 페이지를 넘기는 효과를 추가한 바탕 html을 구성하는 것입니다.
앞서 언급할 과정을 진행하기 전에, 특별한 요구사항이 없다면 노션이나 티스토리와 같은 사이트의 에디터를 사용하여 작업 후 html로 변환하는 것을 추천드립니다.
제가 전달받은 한글 파일을 바로 html로 변경해 달라는 요청은 hwp 파일을 지원하지 않는다는 이유로 Chat GPT에 안 먹히더군요. docx 로 변환한 뒤 html로 바꾸었으나, 텍스트 외의 내용은 제대로 반영되지 않았습니다.
그래서 카드를 넘기듯이 깔끔하게 보이는 html 기본 구조를 ChatGPT의 도움으로 쉽게 구성하고, 이를 조금씩 커스터마이징했습니다. (body 태그는 현재 블로그 글에 영향을 주지 않도록 임시로 id를 부여했습니다.)
<!DOCTYPE html>
<html lang="kor">
<head>
    <meta charset="UTF-8">
    <meta name="viewport" content="width=device-width, initial-scale=1.0">
    <title>Pamphlet</title>
    <link rel="stylesheet" href="https://unpkg.com/swiper/swiper-bundle.min.css">

     <style>

        body #temp{
            font-family: Arial, sans-serif;
            text-align: center;
        }

        .swiper-container {
            height: 740px;
            align-self: center;

        }

        .swiper-slide {
            display: flex;
            flex-direction: column;
            align-items: center;
            background: beige;
            border-radius: 30px;
        }


        .swiper-slide img {
            max-width: 90%; /* This will ensure the image fits within the slide. */
            height: auto; /* This will maintain the image's aspect ratio. */
            display: block; /* This will remove any additional space below the image. */
            margin: 8px auto; /* This centers the image horizontally and adds some space above and below. */
        }


    </style>
</head>
<body id="temp">
<div class="swiper-container">
    <div class="swiper-wrapper">
        <div class="swiper-slide">
            1
        </div>

        <div class="swiper-slide">
            2
        </div>
        <div class="swiper-slide">
            3
        </div>

        <div class="swiper-slide">
            4
        </div>


    </div>
    <div class="swiper-pagination"></div>

</div>

<script src="https://unpkg.com/swiper/swiper-bundle.min.js"></script>
<script>
    var swiper = new Swiper('.swiper-container', {
        grabCursor: true,
        effect: "cards",
        perSlideOffset: 5,
        perSlideRotate: 8,
        creativeEffect: {
            prev: {
                shadow: true,
                translate: ["-120%", 0, -500],
            },
            next: {
                shadow: true,
                translate: ["120%", 0, -500],
            },
        },
        pagination: {
            el: ".swiper-pagination",
            clickable: true,
        },
        slideToClickedSlide: true
    });

</script>
</body>
</html>
아래는 실제 작동하는 예제입니다.
페이지를 넘기는 효과를 위해 아래 라이브러리를 사용했습니다. 필요한 설정은 해당 라이브러리의 도큐먼트에서 참고하여 적용했습니다.
(turn.js도 사용 가능한 라이브러리 중 하나이지만, 모바일 버전에서는 간편하게 한 페이지만 표시되어 넘기는 기능을 찾지 못했습니다.)
https://swiperjs.com/demos#effect-cards
Swiper Demos
Swiper is the most modern free mobile touch slider with hardware accelerated transitions and amazing native behavior.
swiperjs.com
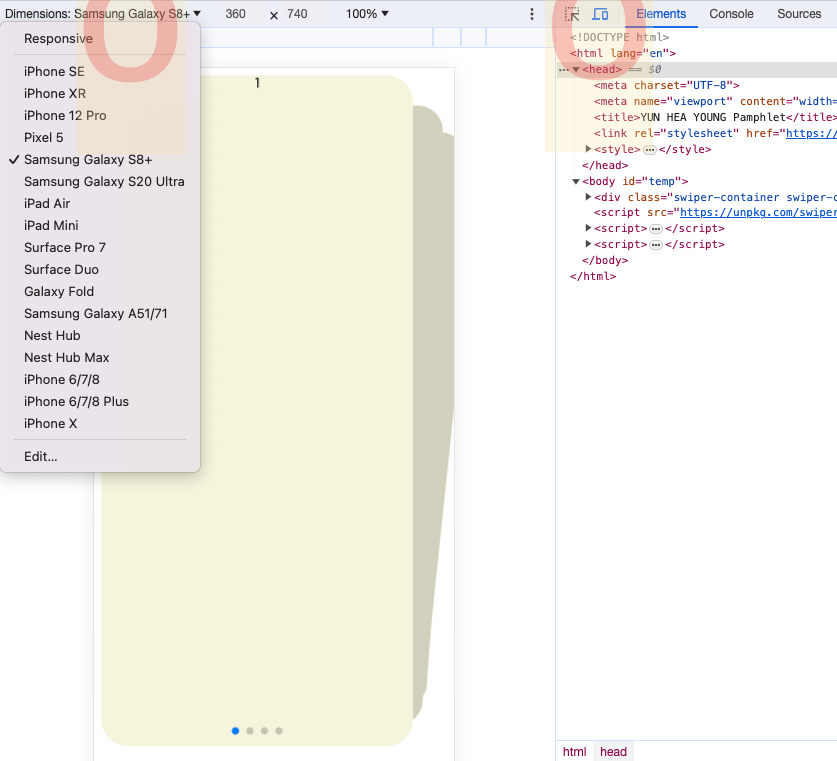
모바일 버전이라고 아까 언급했던 것처럼, 다양한 기종마다 화면 크기가 다르므로 모든 pixel을 일치시키는 것은 어렵습니다. 그렇기에 최소한 width는 기종별로 맞추려고 다음과 같은 코드를 추가합니다.
<meta name="viewport" content="width=device-width, initial-scale=1.0">그리고 한 카드 당 CSS의 display는 flex로 설정하였습니다.
.swiper-slide {
    display: flex;
}
해당 파일을 크롬에서 열고 F12를 누르거나, 우클릭 후 '검사'를 선택한 후 Elements 탭 옆의 아이콘을 클릭하면 모바일 뷰로 변경됩니다. 이를 통해 다양한 기종별 뷰를 미리 확인할 수 있습니다.
자, 이제 내용을 입력할 차례입니다. 한글 파일을 열어서 모든 이미지를 캡쳐해서 이미지 링크를 연결하는 방법도 있지만, 저는 특정 텍스트에 하이퍼링크를 추가하고 싶었기 때문에, 직접 html을 편집하는 방식을 선택했습니다.
<p><a href="https://naver.me/FCBIJru5">파타고니아 영남 알프스점 정원</a></p>

<li><a href="mailto:xxxx@xxxx.com">xxxx@xxxx.com</a></li>
<li><a href="tel:010-xxxx-xxxx">010-xxxx-xxxx</a></li>
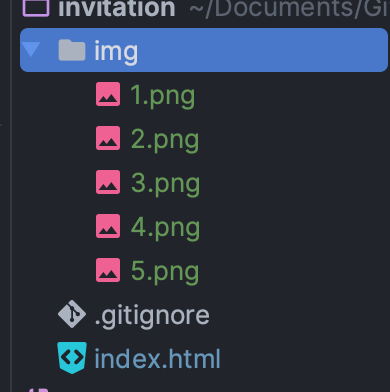
사진을 html에 포함시키려면, 이미지 파일이 외부 링크를 통해 연결되어야 합니다. 전통적인 방법은 이미지 파일을 repository에 같이 업로드하고 해당 이미지 파일의 상대적인 위치로 링크를 연결하는 것입니다. 저는 img라는 디렉토리를 생성하고 이미지를 모았습니다.
그래서 나서 코드에 아래와 같이 index.html이 위치한 곳을부터 사진 파일의 같이 상대적인 주소로 연결해주면 끝입니다.
<div class="swiper-slide" id="no3">
<img
src="./img/2.png"
alt="Artwork 1">
<p style="margin: 5px 0;font-size: 12px;">수국 부부 / 33 × 24cm / acrylic on canvas</p>
<img
src="./img/3.png"
alt="Artwork 2">
<p style="margin: 5px 0;font-size: 12px;">꽃 닮은 친구 / 45 × 45cm / acrylic on canvas</p>
<img
src="./img/4.png"
alt="Artwork 5">
<p style="margin: 5px 0;font-size: 12px;">카랑코에 / 100 × 73cm / watercolor on paper</p>
</div>
img도 카드 밖으로 튀어나가지 않도록 css 설정도 해둡니다.
.swiper-slide img {
    max-width: 90%;  /* This will ensure the image fits within the slide. */
    height: auto;   /* This will maintain the image's aspect ratio. */
    display: block; /* This will remove any additional space below the image. */
    margin: 8px auto; /* This centers the image horizontally and adds some space above and below. */
}
글자 폰트도 css로 추가해야하는데요, 저는 구글 폰트를 썼습니다.
https://fonts.google.com/specimen/Gowun+Batang/tester?preview.size=19&sort=date&subset=korean¬o.script=Kore
Gowun Batang - Google Fonts
Gowun Batang(고운바탕) is a serif text typeface inspired by neat, pencil-written handwriting letterforms. Gowun means ‘neat and delicate’ in Korean and this typefac
fonts.google.com
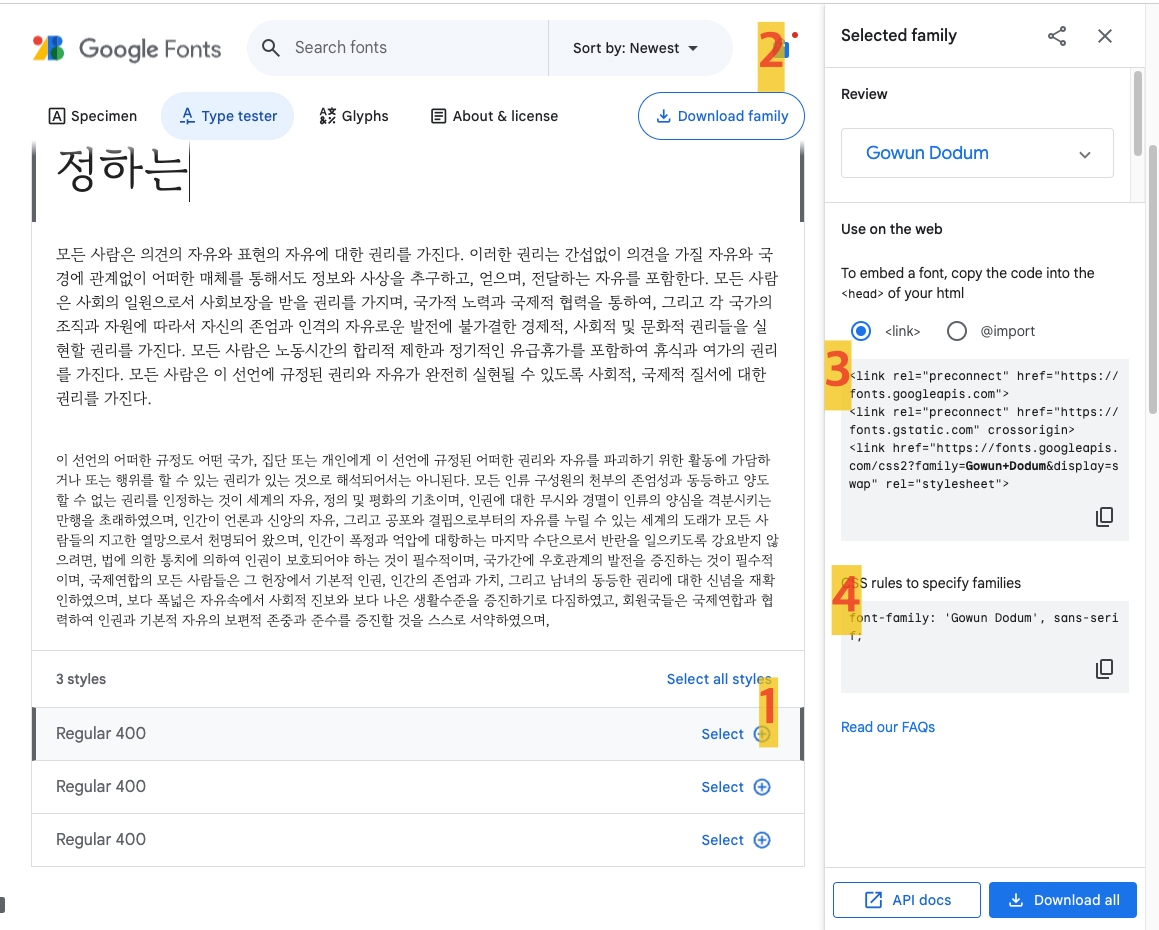
폰트를 선택하려면, select 버튼을 클릭하세요. 선택한 폰트는 우측 상단의 family 섹션에 추가됩니다. 여기서 web 코드를 복사하여 HTML의 head 부분에 붙여넣고, 필요한 폰트 스타일을 style 태그 내에 적용하면 됩니다.
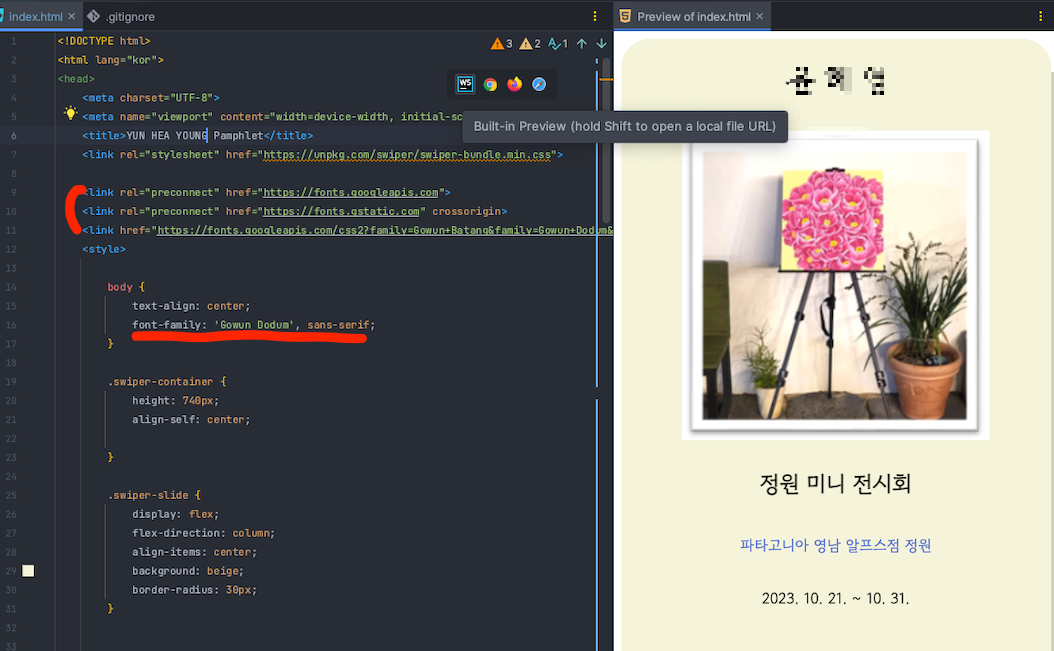
제가 Webstorm을 사용하기 때문에, HTML 상단에 다양한 아이콘들이 표시됩니다. 이 중 WS 아이콘을 클릭하면 'Embedded Web View'와 'Auto Reload' 기능이 활성화되어, 코드를 수정할 때 실시간으로 변경 사항을 확인할 수 있습니다.
우여곡절 끝에 드디어 코드를 완성했습니다. 이제 이 코드를 push하면 완료됩니다.
<!DOCTYPE html>
<html lang="kor">
<head>
<meta charset="UTF-8">
<meta name="viewport" content="width=device-width, initial-scale=1.0">
<title>Pamphlet</title>
<link rel="stylesheet" href="https://unpkg.com/swiper/swiper-bundle.min.css">
<link rel="preconnect" href="https://fonts.googleapis.com">
<link rel="preconnect" href="https://fonts.gstatic.com" crossorigin>
<link href="https://fonts.googleapis.com/css2?family=Gowun+Batang&family=Gowun+Dodum&display=swap" rel="stylesheet">
<style>
body {
text-align: center;
font-family: 'Gowun Dodum', sans-serif;
}
.swiper-container {
height: 740px;
align-self: center;
}
.swiper-slide {
display: flex;
flex-direction: column;
align-items: center;
background: beige;
border-radius: 30px;
}
p, li {
font-weight: 300; /* Light */
font-size: 16px;
}
a {
color: #465fcc; /* Change link color */
text-decoration: none; /* Add underline for clarity */
}
a:hover {
text-decoration: underline; /* Remove underline on hover */
}
/* Remove bullet points from the <li> elements */
.swiper-slide ul {
list-style-type: none;
padding-left: 0;
}
.swiper-slide img {
max-width: 90%; /* This will ensure the image fits within the slide. */
height: auto; /* This will maintain the image's aspect ratio. */
display: block; /* This will remove any additional space below the image. */
margin: 8px auto; /* This centers the image horizontally and adds some space above and below. */
}
.swiper-slide p {
max-height: 90%; /* This will ensure the image fits within the slide. */
height: auto; /* This will maintain the image's aspect ratio. */
}
#photo {
margin-top: 50px;
align-self: auto;
}
.swiper-slide ul {
margin-bottom: 20px;
}
/* Target the last two <li> elements */
.swiper-slide ul li {
text-align: left;
width: 100%; /* Ensure the full width is utilized */
}
</style>
</head>
<body>
<div class="swiper-container">
<div class="swiper-wrapper">
<div class="swiper-slide">
<h1>X X X</h1>
<img
src="./img/1.png"
>
<h2>정원 미니 전시회</h2>
<p><a href="https://naver.me/FCBIJru5">파타고니아 영남 알프스점 정원</a></p>
<p>2023. 10. 21. ~ 10. 31.</p>
</div>
<div class="swiper-slide">
<p style="font-size: 19px; line-height: 1.5; font-family: 'Gowun Batang', serif;">
<b>어</b>느새,<br>
아침 공기가<br>
차갑게 느껴지는 날입니다.<br>
우리의 인생에서도 <br>
가을이 지나가고 있음을 느끼는 시기라 <br>
그 쓸쓸함을 채워 보고자 <br>
용기를 내봅니다.<br><br>
<b>늘</b> 미술에 대한 <br>
같은 열망과 같은 곳을 향하는 시선을 가진 <br>
나의 친구와 <br>
정원에서 작은 전시회를 가집니다.<br>
샛푸른 가을 하늘과 <br>
싱그런 꽃 옆에 <br>
살짝 자리를 만들어 <br>
지난날 그려 놓았던 그림을 걸었습니다.<br><br>
<b>오</b>늘 하루,<br>
아름다운 정원에서 우리의 소박한 그림과 함께 <br>
풍성한 가을의 정취를 느끼며 <br>
힐링되는 시간을 가지시길 바랍니다.<br><br>
2023년 시월에 . . .
</p>
</div>
<div class="swiper-slide" id="no3">
<img
src="./img/2.png"
alt="Artwork 1">
<p style="margin: 5px 0;font-size: 12px;">수국 부부 / 33 × 24cm / acrylic on canvas</p>
<img
src="./img/3.png"
alt="Artwork 2">
<p style="margin: 5px 0;font-size: 12px;">꽃 닮은 친구 / 45 × 45cm / acrylic on canvas</p>
<img
src="./img/4.png"
alt="Artwork 5">
<p style="margin: 5px 0;font-size: 12px;">카랑코에 / 100 × 73cm / watercolor on paper</p>
</div>
<div class="swiper-slide">
<img
src="./img/5.png"
id="photo">
<h1>XXX XXXX XXXXX</h1>
<ul>
<li>XX중학교 근무</li>
<li>XXX 중등미협회원</li>
<li>XXX 미협회원</li>
<li>XXX 미술교육과 졸업</li>
<li>XXX</li>
<li>XXX</li>
<li>XXX미협전</li>
<li>XXX 아티스트전</li>
<li>XXX 초청전</li>
<li>XXX 파스텔 공모전 입상</li>
<li>3인전 XXX, USA</li>
<li>대상수상 XXX,USA</li>
<li> </li>
<li><a href="mailto:xxxxx@xxxx.com">xxxx@xxxx.com</a></li>
<li><a href="tel:010-xxxx-xxxx">010-xxxx-xxxx</a></li>
</ul>
</div>
</div>
<div class="swiper-pagination"></div>
</div>
<script src="https://unpkg.com/swiper/swiper-bundle.min.js"></script>
<script>
var swiper = new Swiper('.swiper-container', {
grabCursor: true,
effect: "cards",
perSlideOffset: 5,
perSlideRotate: 8,
creativeEffect: {
prev: {
shadow: true,
translate: ["-120%", 0, -500],
},
next: {
shadow: true,
translate: ["120%", 0, -500],
},
},
pagination: {
el: ".swiper-pagination",
clickable: true,
},
slideToClickedSlide: true
});
</script>
</body>
</html>그러면 GithubActions에서 자동으로 빌드-배포가 트리거 되네요.
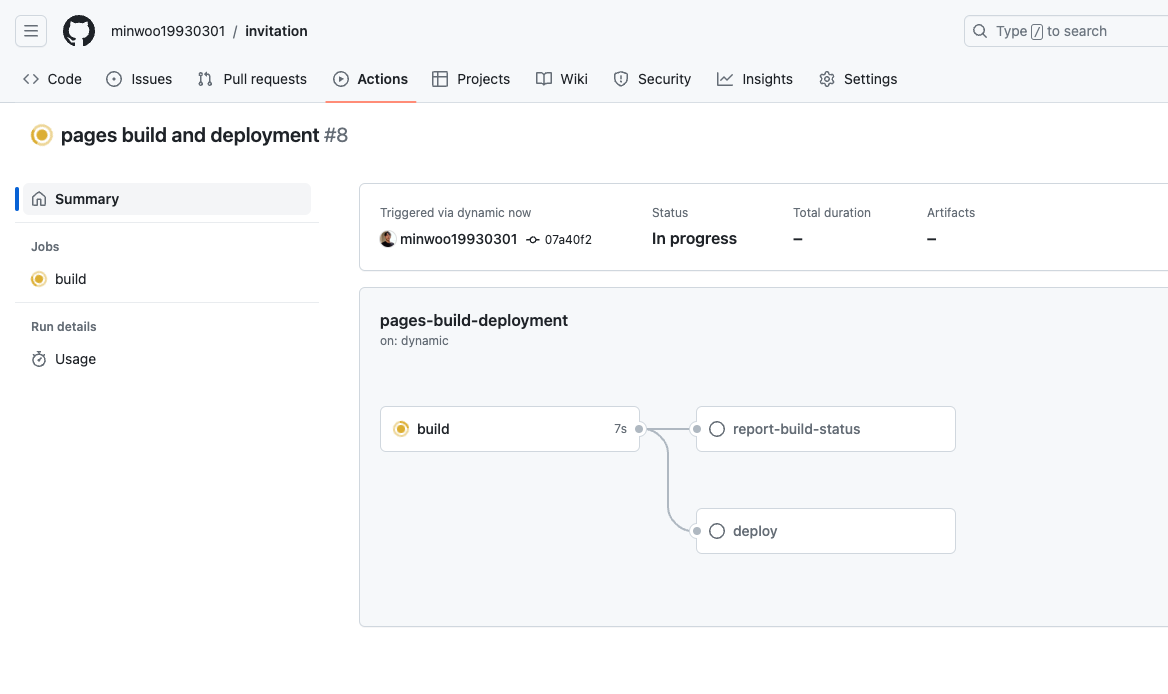
그리고 짜잔! https://minwoo19930301.github.io/invitation/ 링크가 웹에서 제작한 카드 초대장을 확인할 수 있습니다.


이 링크를 https://qr.io/ 에 붙여넣으면 오른쪽에 표시되는 QR 코드처럼 변환된 이미지를 생성할 수 있습니다.
혹은 https://bitly.com/ 와 같은 URL 단축 서비스를 사용해 http://bit.ly/46PAMtV 와 같이 짧게 만들어 공유할 수도 있습니다.
어머니의 단순한 부탁으로 시작해 제가 얻은 이 경험은 정말로 값진 것이었습니다. 물론, 전문가에게 맡기는 것도 크게 비용이 안 들어서 편리하지만, 개발자로서 직접 만들어서 초대장을 보는 것은 전혀 다른 감동이 있더라고요. 그렇게 생각하니, 결혼청첩장이나 돌잔치와 같은 다른 이벤트 초대장도 이런 방식으로 만들면 어떨까 생각했습니다. 다른 개발자 독자들도 이러한 특별한 경험을 직접 해보시길 권하고 싶은 마음을 전하며 글을 마무리합니다.
감사합니다.
'Frontend' 카테고리의 다른 글
| 백엔드 개발자의 험난한 React 캘린더 컴포넌트 만들기 대작전 (feat. Props Drilling) (4) | 2024.01.31 |
|---|---|
| Vue.js와 D3.js를 사용하여 대시보드 만들기 Part1 (0) | 2023.12.20 |
| Browser Fingerprint의 동작 원리와 운영시 예상되는 이슈 (0) | 2023.11.01 |
| 자바스크립트 Map 자료구조 적극 이용하기 (0) | 2023.03.08 |
| 기획전 a11y 개선 프로젝트 (0) | 2023.01.17 |